Claude Desktop Integration
Last updated: November 4, 2025
Connect TengineAI to Claude Desktop for both Pro and Team accounts. This guide will walk you through the complete setup process.
Prerequisites
Before you begin, make sure you have:
- ✅ A TengineAI account and project
- ✅ An OAuth client created in your TengineAI dashboard (with Client ID and Secret)
- ✅ Claude Desktop installed on your system
- ✅ Access to your Claude account (Pro or Team)
Account Types
TengineAI supports both Claude Pro and Team accounts. The setup process is the same for both account types. This guide demonstrates the setup using a Pro account, but the steps are identical for Team accounts.
Setup Guide
Step 1: Get Your OAuth Credentials
- Log into your TengineAI Dashboard
- Navigate to your project settings
- Go to the OAuth Clients tab
- Create a new OAuth client if you haven't already, or use an existing one
- Copy your OAuth credentials:
- OAuth Client ID: Found in your OAuth client details
- OAuth Client Secret: Shown once when the client is created (save it securely)
- Server URL:
https://app.tengine.ai/mcp/
📋 NOTE: Before any tools will be accessible via the MCP server, you'll need to complete the OAuth setup process for the different providers you want to use (Google, Microsoft, etc.). This is done through your TengineAI dashboard under the Tools tab. Make sure the tools you want to use are enabled in your dashboard.
Step 2: Open Claude Desktop Settings
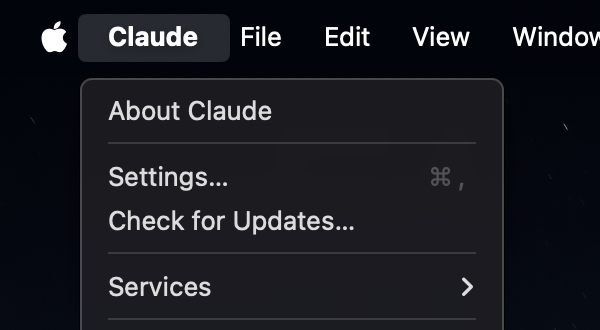
Click on the Claude Settings icon in Claude Desktop.

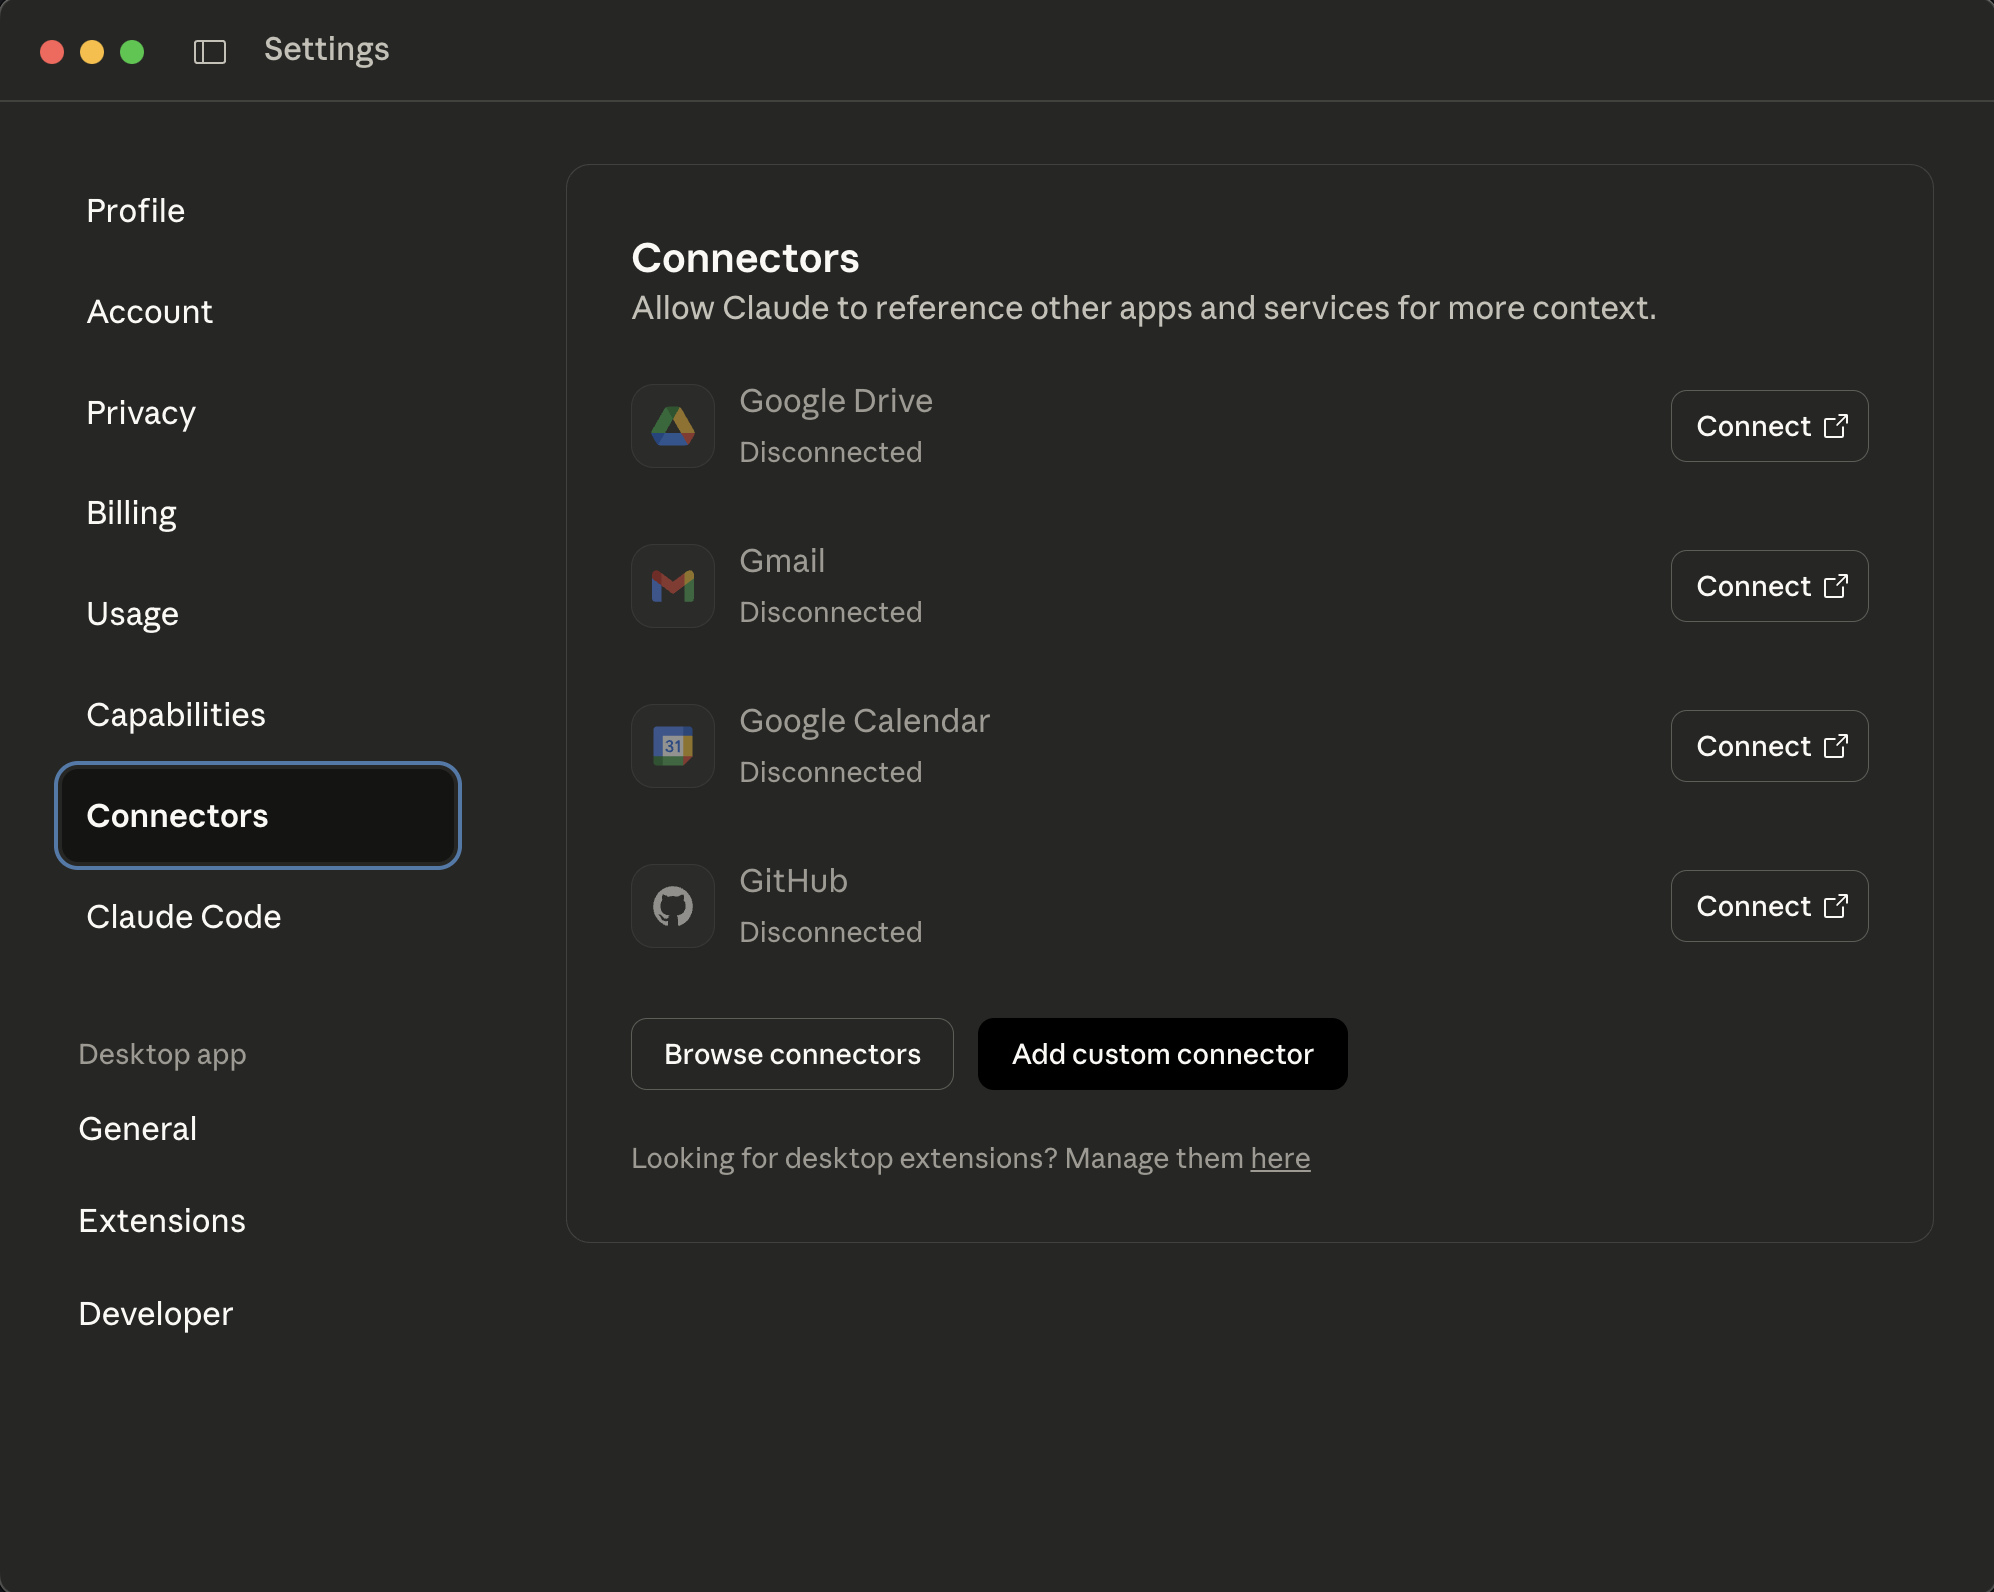
Step 3: Access Connectors
- In Claude Desktop Settings, click on Settings in the left sidebar
- Navigate to the Connectors section

Step 4: Add Custom Connector
- Click the "Add custom connector" button
- Fill in the connector details:
- Name:
TengineAI MCP(or your preferred name) - Remote MCP server URL:
https://app.tengine.ai/mcp/
- Name:
- Click "Advanced settings" to expand the section
- Add your OAuth credentials:
- OAuth Client ID: Paste your TengineAI OAuth Client ID
- OAuth Client Secret: Paste your TengineAI OAuth Client Secret
- Click "Add" to save the connector

Once added, Claude Desktop will automatically connect to the TengineAI MCP server.
Step 5: Verify Connection
- Open a new conversation in Claude Desktop
- Ask Claude: "What tools are available?" or "What MCP servers are connected?"
- You should see TengineAI listed as an available server
- If you've enabled tools in your TengineAI dashboard, Claude should now have access to those tools
💡 TIP: If tools aren't appearing, make sure:
- The OAuth client credentials are correct
- Tools are enabled in your TengineAI dashboard
- OAuth integrations are completed for the providers you want to use